Dictating
Dictating is fast and easy to do with the Fluency direct Speech Understanding Toolbar. You can toggle dictattion using one of two options:
Recording Bar
Microphone Button
You can also use two methods to dictate. The default recording mode is Combined, meaning either of the two methods will work.
Toggle to Talk
Hold to Talk
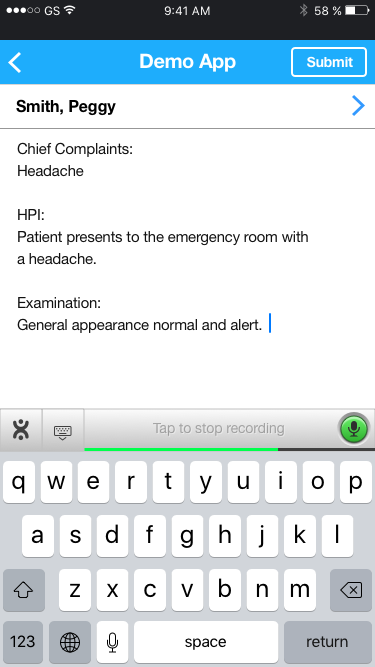
Microphone Button Modes
Enabled, Ready to Record: The microphone button will be gray. The microphone is ready to use and you can begin dictating when ready.
Dictating: When you are dictating, the microphone will be green to indicate that it is in use. The green volume indicator will also be present during the Dictating Mode. While your dictation is being processed, you will see an animated silver M*Modal icon in the text area.
Disabled: The microphone button will be gray (like the Enabled mode) but will be faded to indicate that the microphone is disabled.
Error: The microphone will be red and you cannot dicatte. An example of an error might be that you have no internet connection. An accompanying error message should appear with a red microphone button.
Volume Bar
The Volume Bar will appear at the bottom of the Toolbar. The volume meter will fill left to right, regardless of which side of the screen the microphone button is positioned on. The green bar indicates your dictation volume. You can adjust your voice or the distance to reach a comfortable volume.